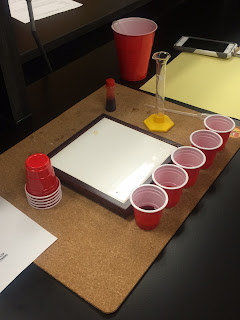
We started out with 10mL of water in a cup and then added red food dye to it. Then we took 1mL of that solution and put it in a new cup, filled with 9mL of un-colored water. We then repeated this 3 more times. Here is what the set-up of the lab looked like:
Each time we moved 1mL of the old dilution to a new cup with water, the dilution became clearer and clearer, creating a cool ombre effect. Here is what all the cups of water looked like after we were done:
Here is a helpful website that I found to help with calculating concentrations and also explaining what dilutions are: Dilutions


Very neat and organized presentation! Also great explanation of what you did step by step during the lab.
ReplyDeleteGreat post! I liked how you included a picture with each step of the lab.
ReplyDelete